In this document, we’ll review the settings available in Matador Jobs and Matador Jobs Pro. These settings give the user, in combination with our shortcodes for presenting Matador elements on WordPress pages, a high degree of customization without needing any knowledge of code.
We will not deeply discuss each setting, especially if the functionality is obvious from its title or in-context description, but the goal of this document is to ensure our users can confidently navigate the settings page and make proper adjustments for their goals.
Additional settings may be added with Matador Jobs Pro All Access Extensions, third-party extensions, or custom extensions made just for you. Information on options added by extensions should be documented on their help pages or in separate documentation provided with the software.
Settings Overview
Access Matador Jobs and Matador Jobs Pro settings by doing the following:
- Log into the WordPress admin for your site.
- In the left, hover or tap on Matador Jobs, followed by Settings.
The Matador Jobs plugin settings page is organized into tabs and sections to help you find you what you’re looking for.
Settings Tabs
At the top of the Settings Page are a collection of tabs. Each tab is a collection of settings grouped together, and the tab name explains the collection. A default installation of Matador Jobs or Matador Jobs Pro will have the following three tabs:
- General, for settings related to the general functionality of the plugin
- Job Listings, for settings related to job import and presentation
- Applications, for settings related to application collection and processing.

The installation of Matador Jobs Pro All Access Extensions and/or third-party or custom extensions may add or remove settings tabs as needed and prudent.
Settings Sections
Under each tab, settings are further grouped into a settings section. A settings section contains related options grouped together under a descriptive title.
For example, under the General Tab one of the settings sections is Email Settings which handles some default settings related to sending email from Matador Jobs.
The installation of Matador Jobs Pro All Access Extensions and/or third-party or custom extensions may add or remove settings sections as needed and prudent.
Save Settings
Scroll to the bottom of any tab on the Settings page and click or tap on the Save Changes button to save changes. Some times, other buttons will save changes for you, like when you click or tap on Connection Assistant and Sync Now, but as a safe practice, make sure you save your changes first.
Onto the Settings
That completes our tour of the settings screen, now let’s dig into the various settings and options you can tweak.
The General Tab
The General Tab is home to settings and options related to the core Matador Jobs and Matador Jobs Pro functionality.
License Key (Pro Only)
Matador Jobs Pro users will see the first settings group is Matador Jobs Pro License. This setting section will allow you to enter your key and authorize your site to receive automatic updates. You may also deauthorize your site (so you can activate your key on other sites).
- Learn more about managing your license, including how to get it, when you should and shouldn’t activate your site, activation troubleshooting, and more, in our dedicated help doc article.
Bullhorn Connection
This settings section will display the status of your Bullhorn connection, provide manual sync options, and let you access the Bullhorn Connection Assistant.
- Learn more about the Bullhorn Connection Assistant.
- Learn more about the Bullhorn Sync
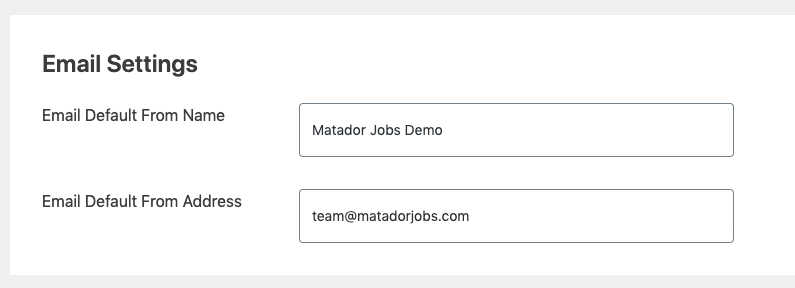
Email Settings
Matador can send many emails, including notification for applications, confirmations for applicants, and admin notifications if the Bullhorn connection fails. Set site-wide settings for email here:
- Default From Name allows you to change the “from” name in the email. This defaults to the “Site Title” in the WordPress General settings when not set.
- Default From Email allows you to change the “from” email in the email. This defaults to the “Administrator Email Address” value in the WordPress General settings when not set.
Logging and Error Handling
This section contains settings related to event logging and error handling.
Matador creates verbose logs to track many aspects of its operation. It’s highly recommended that you save at least 5 days of logs whenever doing custom development, are in staging, or are monitoring an issue, and 2 days of logs when the site is production and functioning well.
Matador can send emails to administrators when it encounters an error that it thinks requires an administrator to intervene to fix.
- Matador Logging allows you to set how many days log files should be saved. Under this setting you can also turn off the feature.
- Send Email Alerts allows you turn on or off emails to administrators when Matador encounters an error that it thinks requires an administrator to intervene to fix.
- Admin Email Address(es) allows you to set a number of email addressed to receive those emails. If left unset, they will be set to the “Administrator Email Address” value in WordPress General Settings.
Job Listings Tab
The Job Listings Tab is home to sections related what to import from Bullhorn, how to assemble your structured data external aggregation by Google for Jobs Search and others, how you want your URLs to appear, and more. Take note of the following:
Bullhorn Import
This section affects the basic import from Bullhorn.
- Automatically Sync Jobs allows you to turn on and off sync. It is uncommon and not recommended to turn off sync in production, but can be useful during development when regular syncing is not required.
- Published Status to Import determines what publishing status to import. This is discussed in detail in the help article Import Your First Jobs.
- Job Date Field helps determine which job date in Bullhorn to use as the date in WordPress. Options are Date Added, when the job listing was first created in Bullhorn, Date Last Updated, when the job ad was last updated in Bullhorn, and Date Last Published when the job ad was last Published in Bullhorn. We recommend using Date Last Published, unless your Published Status to Import is “All Jobs”, in which case you should use Date Last Updated.
- Description Field determines whether the Job Published Description (set in Bullhorn on the job publishing screen) of Job Description (set in Bullhorn on the job edit screen) populates the WordPress content field for the job. We recommend Job Published Description.
- Category Field determines whether the Job Published Category (set in the Job Publishing screen) or the Job Categories (set in the Job Edit screen) are used for the job category. While we recommend the Job Published Category, it only accepts a single category assignment, while the Job Categories accepts multiple category assignments.
- Location Taxonomy Term allows you to determine which of the parts of the address to use for the Location taxonomy term. You will most commonly encounter this in a drop-down or filter list. In the US and Canada, State or Province is recommended, while in the rest of the world City, if you are a single country agency, or Country, if you hire across borders, is recommended.
- “Remote Location” Taxonomy Term allows you to designate whether jobs that qualify as Remote or Work from Home roles also get assigned the “Remote” location term. We recommend this setting be on. For more on how “Work From Home” and “Remote” jobs are identified and managed, see our help article on Remote/Work From Home job listings.
- Show Job Info Header determines whether Matador adds the job info bar before the description in the output of the WP content. If you are building completely custom job layouts, you may wish to turn this off, but if you are using default theme elements and the Matador shortcodes, this should be on.
Jobs Structured Data Section
Structured Data is the hidden computer code that aggregators, like Google for Jobs Search, uses to feature your jobs on their systems. A lot of information can be exposed via Structured Data, and some of it your company may not be allowed to expose. So take note of the following:
The “Hiring Company” Data Source will determine who is credited as offering the role. If you want it to be your company, e.g. “ABC Jobs”, then choose “use Hiring Agency data”, but if you want to highlight the company, e.g. “Coca Cola”, choose “use Client Company data”.
The Show “Pay Rate” Data option allows you to choose to expose or hide salary data from structured data. Some hiring agencies are not allowed to share this information due to agreements from the companies they work with.
Reminder, this is an overview of basic settings for a new user. You will want to set up the Google Indexing API sometime later!
URL Slugs section
In your Bullhorn account, jobs have numeric IDs. In WordPress, jobs also have numeric IDs. To make an easier to use human-friendly experience, we create special URLs for each job that brings up your job data. These are called URL slugs. We have a few settings to customize your users’ experiences.
The Job Single URL Slug setting determines how each job’s URL name is displayed. For example, if the job ID in Bullhorn is 1234 and the title is “Executive Hiring Expert” a URL slug might be executive-hiring-expert-1234. Use this setting to plan that out.
The Job Board Location setting determines where links to “All Jobs” will go. This should be the home page of your jobs. You will either use the “Archive” which is a page made automatically by WordPress using your theme files (and can be customized by a WordPress theme developer) or a WordPress “page” with the [matador_jobs] shortcode.
The Job Listings Slug is the text that goes after your first slash in your domain name and before the Job Single URL Slug. So, let’s say your domain name is www.your-job-site.com and the job is executive-hiring-expert-1234 the job slug sits between these, eg: www.your-job-site.com/job-slug/executive-hiring-expert-1234. It is common for users to make the job listings slug the same as page slug when using a WordPress “page”, otherwise the job listings slug is the URL of the “Archive” (ie: all jobs are at www.your-job-site.com/job-slug/).
Further, in this section, a customizable URL slug for each taxonomy, eg: “category”, “location”, can also be set.
Applications Tab
The Applications Tab is home to sections related how Matador collects applications and sends them to Bullhorn. Take note of the following:
Applications General Settings
The Application Method setting determines where the application form is located. You can choose to have “Apply Now” buttons link to a special generated page (found by adding /apply to the end of the jobs’ url) or adding the application under the job description. You can also have Apply Now buttons redirect to a custom page where you put an application form. This setting somewhat affects how Matador creates job navigation buttons.
The Confirmation Method setting is similar to the above, and determines where the user goes when an application completes. You can redirect to a page, go to a generated page (found by adding /confirmation to the end of the jobs’ url), or go back to the job page with a “thank you” message at the top. The easiest to customize is the redirected page.
The Resume or CV determines which word is used to describe the candidate history document submitted with most applications.
The Classify Applicants setting determines how Matador classifies applications in Bullhorn. Depending on your company workflow, you may want to set this to “Job Submission,” but both we and Bullhorn recommend this be set to “Web Response” as a best practice.
What’s Next?
If you followed along, there are quite a few settings we skipped over for this first run-through of your settings options.
That said, once you’ve got your Matador Jobs set up, we strongly recommend you review the Advanced Matador Settings guide, as well as the guides for in-depth Google Indexing API, Privacy Acts Adherence, and Email Notifications setup.
For now though, let’s do our first manual sync and set up our jobs, search, and application pages.